Build Introduction
Step into the eye of the storm with the Stormweaver, a Spark Archmage build that fuses electrifying offense with unyielding defenses. This is no mere spellcaster—Spark becomes a torrent of destruction, amplified by Archmage’s raw mana-fueled might. With Chaos Inoculation shielding you from chaos damage and Eldritch Battery paired with Mind Over Matter turning your intellect into an impregnable fortress, you’ll weave through maps as a force of nature, leaving only ash and destruction in your wake.
Strengths and Weaknesses
- Strong Mapping
- Strong Defensive Layer
- Controller Friendly
- Moderate Gearing Goes Far
- Mana Intensive
- Movement Skill on Weapon Swap
- Not a Face Tanker
Build Mechanics
The Stormweaver Spark Archmage build offers a manageable gameplay experience versus white packs with one button, played optimally with two buttons for maximum performance. Spark serves as the primary skill for clearing maps and efficiently handling generic enemies without the need for curses. In contrast, the secondary skill, ![]() Orb of Storms, is crucial for mana regeneration (from
Orb of Storms, is crucial for mana regeneration (from ![]() Font of Mana) and boosting damage through its scaled shock effect with
Font of Mana) and boosting damage through its scaled shock effect with ![]() Overcharge. With more challenging adversaries like magic or rare monsters, strategic use of
Overcharge. With more challenging adversaries like magic or rare monsters, strategic use of ![]() Conductivity to amp your lightning damage and
Conductivity to amp your lightning damage and ![]() Enfeeble for defensive purposes becomes vital. With bosses, the focus is on casting Spark as quickly as possible, weaved in with moments of movement to evade deadly attacks and secondary casts. This ensures both offensive prowess and personal safety are maintained throughout the encounter.
Enfeeble for defensive purposes becomes vital. With bosses, the focus is on casting Spark as quickly as possible, weaved in with moments of movement to evade deadly attacks and secondary casts. This ensures both offensive prowess and personal safety are maintained throughout the encounter.
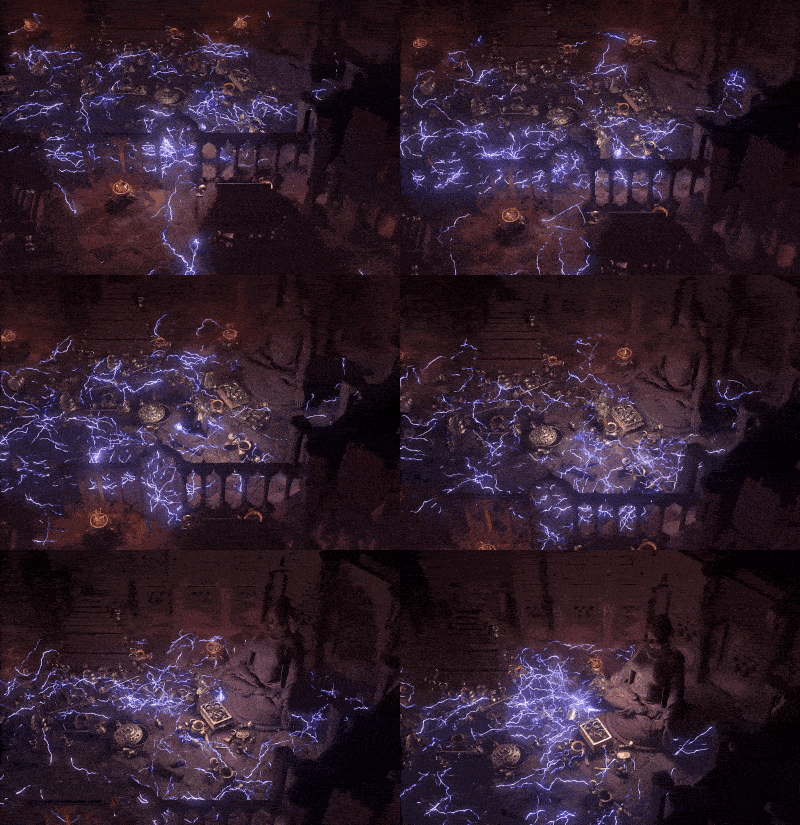
Skill Rotation
Follow the quick skill rotation below to progress through the campaign and clear groups of enemies in maps.
- Cast
 Flame Wall.
 - Cast
 Spark through the Flame Wall. (This will usually be the last step on white mobs)
 - Cast
 Enfeeble and
  Conductivity to ensure maximum DPS and Defensive posturing.
 - Cast
 Orb of Storms twice in the vicinities between you and enemies.
 - Repeat as necessary
-
 Detonate Dead can clean up a straggler(s) if anything is left.
Execute the steps below to optimize damage against bosses.
- Cast
 Enfeeble and
  Conductivity to ensure maximum DPS and Defensive posturing.
 - Cast
 Orb of Storms twice in the vicinities between you and the enemy(s).
 - Cast
 Sigil of Power to increase damage.
 - Cast your
 Flame Wall/
 Spark combo.
 - Evade dangerous attacks, only returning to your
 Sigil of Power if your path is safe.
 - If anything is left,
 Detonate Dead. This can hit very hard in areas with high HP monsters. It can easily wipe the last bit of life out of most enemies in a decently sized area. Detonating the rare enemy’s corpse will almost surely kill anything remaining. Remembering where you killed a rare monster is sometimes a good “run back to” idea if you run into a problematic pack.
Gameplay Tips
Mastering the “Orb Walking” technique is crucial for optimizing gameplay efficiency. This technique involves simultaneously moving and using your skills, explicitly walking while casting ![]() Spark, and strategically placing down
Spark, and strategically placing down ![]() Orb of Storms. This helps maintain continuous damage output and ensures mana regeneration without interrupting your movement, allowing you to keep a fluid pace throughout the game.
Orb of Storms. This helps maintain continuous damage output and ensures mana regeneration without interrupting your movement, allowing you to keep a fluid pace throughout the game.
Navigational map/area awareness is key, especially in confined spaces like hallways, tight corners, or areas with an elevation change. Understanding your environment allows for quick application of the ![]() Enfeeble curse, which can activate your Weapon Swap (2), providing your
Enfeeble curse, which can activate your Weapon Swap (2), providing your ![]() Blink ability. This Blink can serve as a rapid escape or repositioning tool to a known safe spot or leverage changes in terrain to your advantage. It is always best to err on the side of caution; fighting blindly is rarely a good idea.
Blink ability. This Blink can serve as a rapid escape or repositioning tool to a known safe spot or leverage changes in terrain to your advantage. It is always best to err on the side of caution; fighting blindly is rarely a good idea.
Specifically, we use the Enfeeble curse for swapping, as its cast is almost always instantaneous and provides a defensive posture when targeting enemies while retreating.
![]() Orb of Storms can be tactically deployed to control enemy movement, such as funneling foes toward a chokepoint like a door or a corner while keeping you out of direct harm. When near your Orb of Storms, it will activate in sync with your
Orb of Storms can be tactically deployed to control enemy movement, such as funneling foes toward a chokepoint like a door or a corner while keeping you out of direct harm. When near your Orb of Storms, it will activate in sync with your ![]() Spark casts, chaining and striking enemies from a distance. This setup enables you to safely manage groups of enemies by placing the Orb of Storms, opening a door, retreating, and casting Spark from a secure position. Do not try to be the welcoming committee for mobs of enemies stacked at the door; you’ll have a bad time (mmkay).
Spark casts, chaining and striking enemies from a distance. This setup enables you to safely manage groups of enemies by placing the Orb of Storms, opening a door, retreating, and casting Spark from a secure position. Do not try to be the welcoming committee for mobs of enemies stacked at the door; you’ll have a bad time (mmkay).
Our Weapon Swap 2 is scaled to be mobile. Nominally, you would traverse the map with this weapon system active. We are not entirely defenseless, as ![]() Detonate Dead and
Detonate Dead and ![]() Arctic Armour are also activated in this swap. The other lightning-based skills would not be efficient without our Archmage, so using them would be pointless. We also have
Arctic Armour are also activated in this swap. The other lightning-based skills would not be efficient without our Archmage, so using them would be pointless. We also have ![]() Clarity with this system active, allowing us to boost mana regeneration when moving between packs around a map.
Clarity with this system active, allowing us to boost mana regeneration when moving between packs around a map.
Upon entering a new map, it’s advisable to cast ![]() Spark in multiple directions immediately. This initial burst can clear nearby threats, but give it a moment after you cast to assess if any additional enemies or stragglers approach to being attacked. This tactic helps manage crowd control immediately, avoiding portal-in ambushes in densely packed nearby areas. It is also advisable to precast an area with
Spark in multiple directions immediately. This initial burst can clear nearby threats, but give it a moment after you cast to assess if any additional enemies or stragglers approach to being attacked. This tactic helps manage crowd control immediately, avoiding portal-in ambushes in densely packed nearby areas. It is also advisable to precast an area with ![]() Flame Wall and Spark before activating any league mechanics; the residual effects of the bounces from spark projectiles may save you from being overrun.
Flame Wall and Spark before activating any league mechanics; the residual effects of the bounces from spark projectiles may save you from being overrun.
Clear the immediate area first, THEN collect. I cannot tell you how often I have seen people die when trying to collect gear or currency that falls while enemies or ground effects are still present. Weaving through hordes of monsters and over-pulling packs that eventually swarm and kill you when you try to pick up loot will almost always result in bad news. Only retreat in directions you have cleared, or you may run into more monsters than from which you initially retreated.
Skill and Support Gems
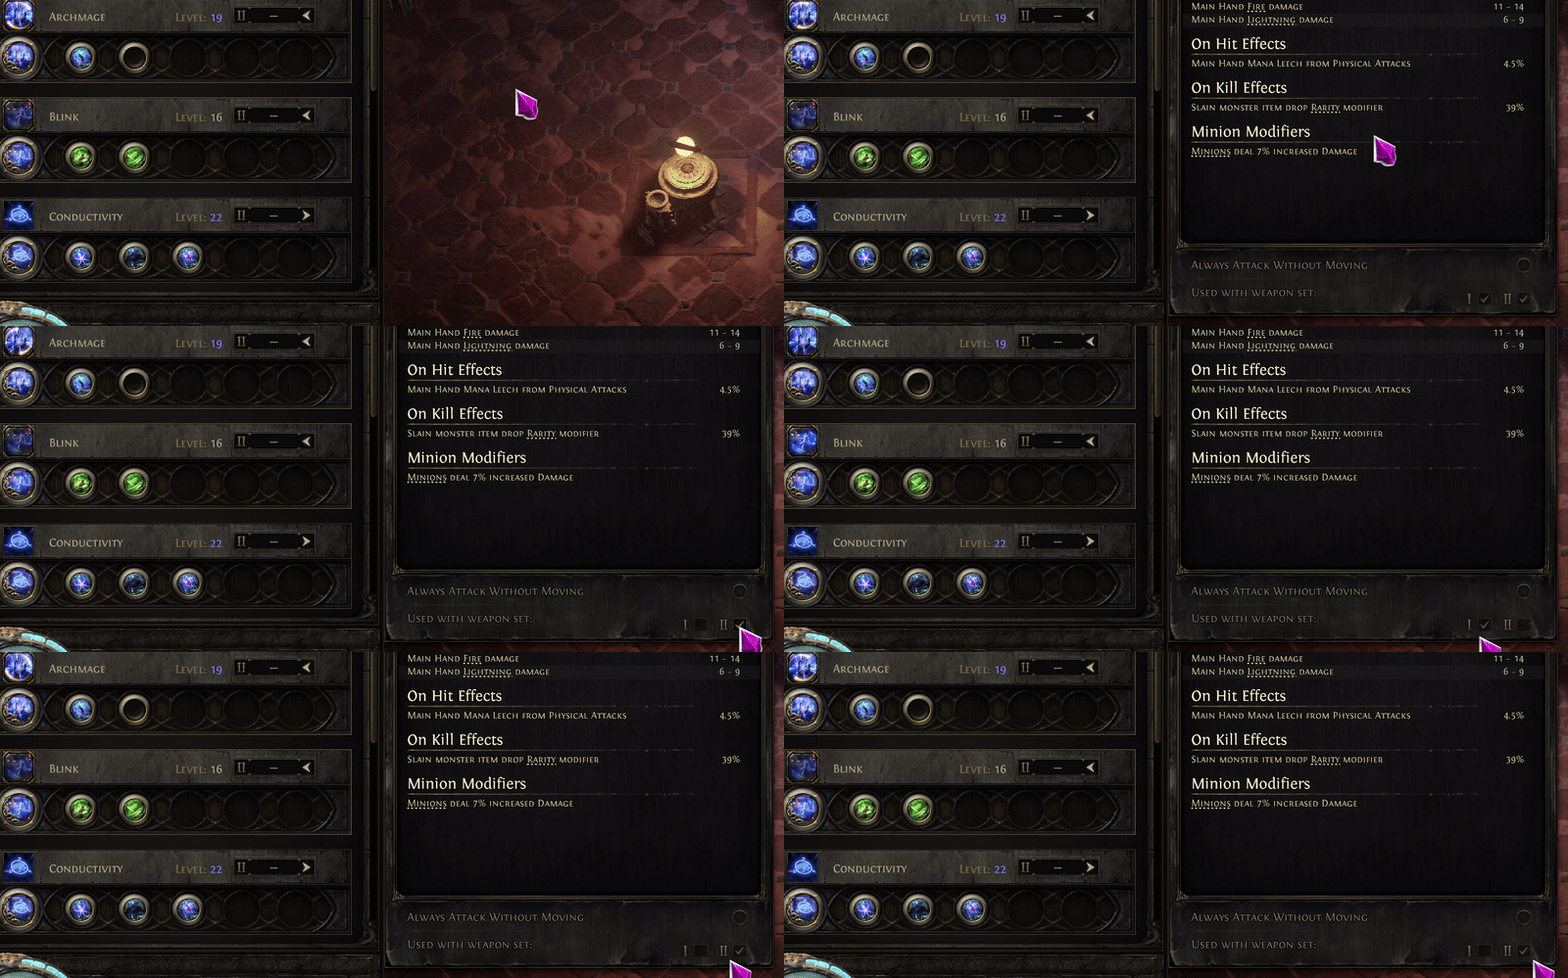
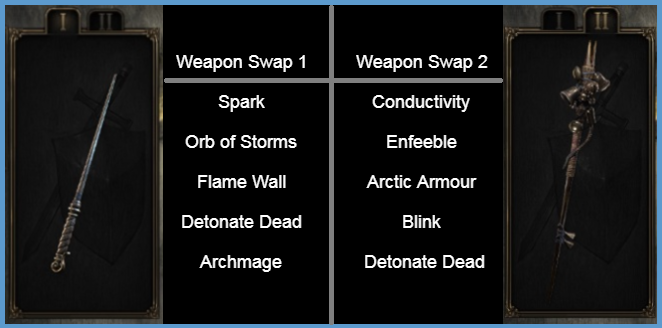
There is a gem setup for Weapon Set 1 and Weapon Set 2. Please refer to the Weapon Set setup section to ensure your automation runs smoothly. Also, remember that we use two different weapons, including the staff with the ![]() Sigil of Power skill. The support gems are listed in order of importance.
Sigil of Power skill. The support gems are listed in order of importance.
 Spark (Weapon Set 1)
 Arcane Tempo
 Considered Casting
 Inspiration
 Controlled Destruction
 Lightning Penetration <–>
  Acceleration
 Orb of Storms (Weapon Set 1)
 Lightning Exposure
 Strip Away
 Font of Mana
 Overcharge
 Overabundance
 Flame Wall(Weapon Set 1)
 Fire Mastery
 Detonate Dead (Weapon Set 1)
 Concentrated Effect
 Elemental Focus
 Spell Echo
The Following are exclusive to Weapon Set 2 but equally crucial. Their corresponding support gems are listed in order of importance.
 Conductivity(Weapon Set 2)
 Heightened Curse
 Hex Bloom
 Enfeeble(Weapon Set 2)
 Decaying Hex
 Focused Curse
Spirit Gems
This Spirit Gem setup requires 100 total Spirit. Defeating King of the Mists in Freythorn (Act 1), Ignagduk, the Bog Witch in The Azak Bog twice, in Act 3 and Act 6. Because of the Weapon Swap system, we can use 200 Spirit, with 100 assigned to Weapon Swap 1 and 100 to Weapon Swap 2.
 Archmage(Weapon Set 1)
 Lightning Mastery
 Blink(Weapon Set 2)
 Ingenuity
 Second Wind
 Arctic Armour (Weapon Set 2)
 Blind
Blind Clarity
Weapon Skills
Your Staff should be one with the ![]() Sigil of Power, and we will not be using whatever skill our wand has. This skill will default to Weapon Slot 2.
Sigil of Power, and we will not be using whatever skill our wand has. This skill will default to Weapon Slot 2.
 Sigil of Power
 Magnified Effect
 Persistence
Ascendancy
Stormweaver is the required ascendancy for this Spark Archmage build. The ascending order is listed numerically in the order we recommend following.
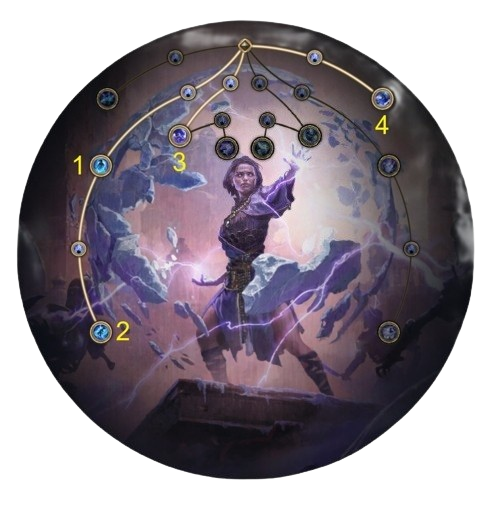
- Stormweaver
- Constant Gale (
 Arcane Surge)
 - Force of Will
- Strike Twice
- Scouring Winds
- Constant Gale (
Passive Skill Tree and Path of Building
Path of Building is a program Path of Exile players use to track, decipher, prepare, and sort builds. You can download it by visiting here and choosing the Path of Exile 2 Download link. For more information, visit our guide to Path of Building.
In the POB I have various setups, jewel variations, or stretch leveling you can swap through. (located in the bottom left)

Weapon Swap Set Setup
When setting up your skill gems, assigning each one individually to a specific weapon is IMPERATIVE, as listed in the Gem Setup below. For your convenience, a quick reference is provided below the demo image.
NOTE: ![]() Detonate Dead is on both weapon swaps, in case you need quick damage while in swap 2, but weapon swap 1 will be immensely more powerful.
Detonate Dead is on both weapon swaps, in case you need quick damage while in swap 2, but weapon swap 1 will be immensely more powerful.
Gear
The preferred gear for the Stormweaver Spark Archmage is listed below. The gear (if more than one option) and affixes are ranked in order of importance. Prioritize gear with the correct base item stats and beneficial explicit affixes. Gear that can have sockets also has them listed in order of importance in the same way. Resistances have been left out, several suffixes have been left open, and a recommended suffix is placed in the areas that could give resistance. 110% of Fire, Cold, and Lightning must be acquired to cap your resistance.
| Equipment Slot and Base Stats | Explicit Affixes |
|---|---|
Wand (Weapon Slot 1) | Prefix: 1. +# to Maximum Mana 2. #% Increased Spell Damage 3. Gain #% of Damage as Extra Lightning Damage Suffix: 1. +# to Level of all Lightning Spell Skills 2. #% increased Cast Speed 3. +# Intelligence |
Chiming Staff (Weapon Slot 2) | Prefix: 1. +# to Maximum Mana 2. +# increased Spell Damage / +# to Maximum Mana 3. #% Increased Spell Damage Suffix: 1. +# to Level of all Spell Skills (Empowers both curses) 2. #% increased Cast Speed 3. #% increased Mana Regeneration Rate |
Off-Hand (Weapon Swap 1) Expert Plumed Focus #1 (2) Soul Core of Zalatl #2 (2) Iron Rune | Prefix: 1. +# to Maximum Mana 2. #% Increased Spell Damage 3. Gain #% of Damage as Extra Lightning Damage Suffix: 1. +# to Level of all Lightning Spell Skills 2. #% increased Cast Speed 3. +# Intelligence |
Helmet Expert Feathered Tiara #1 Soul Core of Zalatl #2 Iron Rune | Prefix: 1. +# to Maximum Energy Shield 2. +# Maximum Mana 3. #% increased Energy Shield Suffix: 1. Needed Resistance or +# Intelligence 2. Needed Resistance or #% Increased Rarity 3. Needed Resistance |
Body Armour  #1 Expert Keth Raiment (expensive) #2 Ghostwrithe (cheap) #1 (2) Soul Core of Zalatl #2 (2) Iron Rune | Ghostwrithe is a very viable option for early into late game. It can easily add 2,000 to your energy shield. As of 0.1.1f, it works properly with Chaos Inoculation. Prefix: 1. +# to Maximum Energy Shield 2. +# to Maximum Energy Shield / #% increased Energy Shield 3. #% increased Energy Shield Suffix: 1. Needed Resistance 2. Needed Resistance 3. Needed Resistance |
Boots Expert Feathered Sandals #1 (2) Soul Core of Zalatl #2 (2) Iron Rune | Prefix: 1. #% increased Movement Speed 2. +# Maximum Mana 3. +# to Maximum Energy Shield Suffix: 1. Needed Resistance or +# Intelligence 2. Needed Resistance or #% Increased Rarity 3. Needed Resistance |
Gloves Expert Intricate Gloves #1 (2) Soul Core of Zalatl #2 (2) Iron Rune | Prefix: 1. +# Maximum Mana 2. +# to Maximum Energy Shield 3. #% increased Energy Shield Suffix: 1. Needed Resistance or +# Intelligence 2. Needed Resistance or #% Increased Rarity 3. Needed Resistance |
Amulet The Everlasting Gaze | Quality 20% with Neural Catalyst Anoint Lightning Rod with the following recipe. (2) Distilled Isolation  (1) Distilled Suffering  |
Ring (2) Breach Ring | Prefix: 1. +# to Maximum Energy Shield 2. +# to Maximum Energy Shield / #% increased Energy Shield 3. #% increased Energy Shield Suffix: 1. Needed Resistance 2. Needed Resistance 3. Needed Resistance |
Belt Linen Belt | Prefix: 1. +# Maximum Mana 2. #% increased Flask Mana Recovery Rate 3. +# Maximum Life (+# Amour if not using Ghostwrithe) Suffix: 1. +# Charm Slots 2. Needed Resistance 3. Needed Resistance |
Jewels
The beneficial affixes for Jewels are listed below and ranked in order of importance. Prioritize Rare Jewels with two prefixes and two suffixes. The order of importance is listed below. Also, please note that there is a defensive jewel setup and an offensive jewel setup; depending on your current needs, these can be mixed and matched. Getting any mix of prefixes and suffixes can be helpful if you know what you need. You will have five (5) Jewels on the planner, but seven (7) are easily obtainable at higher levels. Please note that if trading, finding all the affixes on the jewel as ordered could be expensive, depending on league economics. Target them as seen, “1” being the most important and “2” being secondary.
Each offensive Sapphire Jewel offers around 16,000-17,000 DPS and ~21 mana regen at the listed setup in PoB.
- Offensive Prefixes
- Increased Magnitude of Shock you inflict
- Increased Elemental Damage – for our purposes, this is interchangeable with “Increased Spell Damage.”
- Offensive Suffixes
- Increased Mana Regeneration Rate
- Increased Skill Effect Duration
Each defensive Sapphire Jewel provides an additional 250 Energy Shield and 600 EHP (Effective Hit Pool) in addition to ~21 mana regen at the listed setup in PoB. Mana recovery on kill is typically seen as very strong and expensive in trade, and you only need a couple of well-rolled mana recoveries on kill to min/max the build.
- Defensive Prefixes
- Increased Maximum Energy Shield
- Faster start of Energy Shield Recharge
- Defensive Suffixes
- Recover #% of Mana on Kill
- Increased Mana Regeneration Rate
Flasks and Charms
Flasks and Charms both serve as an incredible tool defensively and sometimes offensively in Path of Exile 2. Prioritize the Flasks and Charms with the correct base item stats and beneficial explicit affixes listed below.
Life Flask Slot 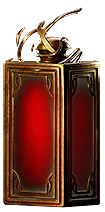 #1 Olroth’s Resolve (Very Expensive) #2 Ultimate Life Flask | The Olroth’s Resolve flask is not required; it is a powerful bonus. 20% Quality Prefix: #% increased Amount Recovered Suffix: Gains # Charges per Second |
Mana Flask Slot  #1 Melting Maelstrom (Expensive) #2 Ultimate Mana Flask | The Melting Maelstrom flask is not required, just a bonus. 20% Quality Prefix: #% increased Amount Recovered Suffix: Gains # Charges per Second |
Charm Slot #1 Stone Charm | Prefix: Gain # Guard During Effect Suffix: % Chance to gain a Charge when you Kill an Enemy |
Charm Slot #2 Thawing Charm | Prefix: Gain # Guard During Effect Suffix: % Chance to gain a Charge when you Kill an Enemy |
Charm Slot #3 Shocking Charm | Prefix: Gain # Guard During Effect Suffix: % Chance to gain a Charge when you Kill an Enemy |
Variant Build
This is a highly affordable version of a strong build. There is a variation where the Ghostwrithe can be skipped, and you can get a chest with high Spirit and an Increased energy shield and run the build with ![]() Grim Feast and
Grim Feast and ![]() Clarity (Dropping Arctic Armour if you need to clear a skill slot). You can also use the incredibly expensive Unique Shield Mahuxotl’s Machination Omen Crest Shield with 3 Soul Core of Zalatl. Furthermore, the Unique Belt Ingenuity would turn our existing rings into an unreal amount of mana (which is also health and damage). Adding these three things would make the build “Mirror Tier,” albeit not obtainable to most players. This build could help you obtain such gear, but I would argue that once they reach this level of play, most players would no longer be reading such a guide.
Clarity (Dropping Arctic Armour if you need to clear a skill slot). You can also use the incredibly expensive Unique Shield Mahuxotl’s Machination Omen Crest Shield with 3 Soul Core of Zalatl. Furthermore, the Unique Belt Ingenuity would turn our existing rings into an unreal amount of mana (which is also health and damage). Adding these three things would make the build “Mirror Tier,” albeit not obtainable to most players. This build could help you obtain such gear, but I would argue that once they reach this level of play, most players would no longer be reading such a guide.
Frequently Asked Questions
- Why are you not using
 Mana Tempest? It’s so strong!
- I have experimented with Mana Tempest. It is strong, and although everything dies relatively quickly, our mana is our life; One mistake kills you. Because of our cast speed, we incur an astronomical amount of mana loss upon usage. This made me uncomfortable sending guided players into a fight where they quickly lost their life source.
- I feel like I don’t do enough damage!
- This is possible if you are trying to run this build without a few things already: 1) You have not fully ascended. The only exception to this is the final ascension, but that additional 20% exposure effect will make a difference. 2) If you have less than 3,000 mana, you are missing out on much of the benefits of the build. The Arcane Intensity node alone will increase your lightning damage by 90%. Your wand is another key source of increased damage. 3)
 Considered Casting and
  Controlled Destruction are the imperative “More” multipliers we crave; they add 70% more damage. 4) This goes with the mana listed above. It doesn’t affect damage per instance, but it does affect DPS. Your
  Arcane Surge ascendancy is incredibly strong, and not having enough mana will kill your cast speed and mana regen. 5) The enemies are not getting exposed/cursed or both because your
  Orb of Storms or your
  Conductivity is not hitting them. This is our sole source of exposure and must be used to push enemies into the negative % of resistance. Remember: Penetration is applied after exposure and curses!
- This is possible if you are trying to run this build without a few things already: 1) You have not fully ascended. The only exception to this is the final ascension, but that additional 20% exposure effect will make a difference. 2) If you have less than 3,000 mana, you are missing out on much of the benefits of the build. The Arcane Intensity node alone will increase your lightning damage by 90%. Your wand is another key source of increased damage. 3)
- I keep dying!
- Are you still using the same gear from Act 3 now that you’re in Maps? Remember, each act reduces your resistances by 10%, so have you kept them capped? This build isn’t about hugging monsters; it’s for mid-range to long-range engagement. This also applies to our mana talk from above; Mana is our everything. It is our life, our damage, our cast speed. Also, getting good is still the best way to stop dying. (This is a joke)
- Why are you using
 Controlled Destruction? You’re missing out on so much damage!
- No. We have specifically oiled Lightning Rod in our Amulet. Let me explain why this matters with math. Our (Base Level 20 Spark) average non-crit hit is 240. But since we are “lucky,” we get to alter this average, which gives us an average of 312—an increase of almost 30% or 72 base damage. So, while our crit might hit harder, this crit would first need to happen, which is ~ 9% of the time. Which, after math, means your average hit is 262. We would need a 30% chance to crit or a multiplier of over 400% to be the same damage as being “Lucky.” This doesn’t include the “more” damage added by
 Controlled Destruction, either. TLDR: No, I’m not missing out on so much damage.
- No. We have specifically oiled Lightning Rod in our Amulet. Let me explain why this matters with math. Our (Base Level 20 Spark) average non-crit hit is 240. But since we are “lucky,” we get to alter this average, which gives us an average of 312—an increase of almost 30% or 72 base damage. So, while our crit might hit harder, this crit would first need to happen, which is ~ 9% of the time. Which, after math, means your average hit is 262. We would need a 30% chance to crit or a multiplier of over 400% to be the same damage as being “Lucky.” This doesn’t include the “more” damage added by
- I can’t seem to drop any gear, and I seem to miss every craft!
- Welcome to Path Of Exile! You are now part of an elite group of players who seem to miss 99% of almost everything we do! Seriously though, I know this is frustrating! However, there isn’t much I can do besides point you to trade or tell you to continue to craft. Perhaps try another crafting technique. Visit our crafting page here for help.
- Where can I go if I have more specific questions?
- You are always welcome to ask questions in our ARPGVault Discord or visit my Twitch stream!
Changelog
March 28th, 2025: Guide created for Path of Exile II, Early Access
 Mercenary
 Monk
Monk Ranger
 Sorceress
 Warrior
 Witch
Witch