Structure of the Trial
What is the Trial of Chaos?
The Trial of Chaos is the second method of Ascension you will encounter when playing through the campaign. It consists of a series of up to 10 challenge rooms with between 1-3 boss encounters. Throughout a Trial of Chaos run, you will be forced to choose from a selection of Tribulations that will make all future rooms more difficult.
Completing the Trial of Chaos will earn you a variety of interesting loot, including Soul Cores, corrupted Rare items, and finally, in the endgame, the opportunity to fight The Trialmaster himself! If you are looking for a guide on The Trialmaster fight, you can find that here.
Accessing the Trial of Chaos
You access the trial with an  Inscribed Ultimatum and will receive your first one upon defeating Xyclucian the Chimera in the Chimeral Wetlands in Act 3. After acquiring the
  Inscribed Ultimatum, you will need to travel to the Trial of Chaos, the entrance of which you will also find in the Chimeral Wetlands. Simply interact with the Temple Offering Altar and insert the
  Inscribed Ultimatum.
This quest item will allow you to attempt the Trial of Chaos as often as you would like until you succeed. Once you have completed this quest Ultimatum you will be granted 2 additional Ascendancy passive points. It is important to note that if you have already Ascended in the Trial of the Sekhemas, you will have 4 points, but if you have not Ascended yet, you will only have 2.
Further attempts beyond the first successful run will require you to find additional  Inscribed Ultimatums, which are a random drop found throughout the game. These non-quest items are consumed on use, whether you complete the run or not.
  Inscribed Ultimatums will drop with either 4, 7, or 10 Rooms and the Trialmaster Arena. The required item levels for Ultimatums are:
- Level 38 – 4 Rooms – First 2 Ascendancy Points (or 3rd and 4th if already Ascended from The Trial of the Sekhemas)
- Level 60 – 7 Rooms – 3rd and 4th Ascendancy Points
- Level 75 – 10 Rooms -5th and 6th Ascendancy Points
- Level 75 – 10 Rooms AND Defeating The Trialmaster – 7th and 8th Ascendancy Points
Room Types
Progressing through the Trial of Chaos follows a set schedule. Below you will find that schedule as well as some basic information about each of the challenge room types:
- Room 1: Defeat All Monsters
- Room 2: Survive
- Room 3: Escort the Stone Statue OR Collect All Soul Cores
- Room 4: 1st Boss Encounter
- Room 5: Defeat All Monsters OR Survive
- Room 6: Blood Altar Sacrifice OR Collect All Soul Cores
- Room 7: 2nd Boss Encounter
- Room 8: Defeat All Monsters or Survive
- Room 9: Blood Altar Sacrifice or Escort the Stone Statue
- Room 10: 3rd Boss Encounter
Defeat All Monsters
This room is a simple one; kill all the monsters.
Survive
In this room, you must survive constantly spawning waves of monsters after clicking the altar. While you aren’t required to kill anything to succeed, by quickly eliminating waves, you will spawn more Rare monsters that will drop additional loot, and you will prevent yourself from being overwhelmed.
Escort the Stone Statue
Everyone’s favourite game mechanic! You will be escorting a very slow-moving idol as it navigates across the room while being regularly assaulted by packs of monsters. This room can be particularly dangerous if you have taken Tribulations that punish you for standing still. These include Volatile Fiends, Impending Doom, or Petrification Statues.
Collect All Soul Cores
This room can be particularly tricky until you become familiar with the available layouts. You will need to hunt down three Soul Core items scattered about the room and return with them one at a time to a central altar. While carrying a Soul Core, you will take increasing damage over time and will be unable to pick up any other Soul Cores.
Blood Altar Sacrifice
Scattered around the Arena in this room you will find large red circles. Your mission here is to kill monsters inside the circles until they fade, feeding blood to the central altar. After successfully killing enough monsters in each of the circles the room will be completed.
Tribulations
Before every room you will be required to choose one of three randomly generated tribulations that will make every remaining room more difficult. Some modifiers have multiple tiers that will become available options after selecting the tiers before them. Below you will find a full list of the Tribulations, their effects, and some guidance on how they may affect your run.
 Reduced Recovery
- Tier: 1 – 40% reduced Life, Mana, and Energy Shield Recovery Rate
- Tier: 2 – 75% reduced Life, Mana, and Energy Shield Recovery Rate
- As this modifier affects all forms of recovery, it is genuinely worth avoiding if at all possible
 Lessened Reach
- Tier: 1 – 50% less Area of Effect and Projectile Speed
- Essentially a free modifier for most builds, it can be annoying even if it isn’t dangerous.
- Tier: 1 – 50% less Area of Effect and Projectile Speed
 Time Paradox
- Tier: 1 – Buffs expire three times faster and Debuffs expire three times slower
- For builds that rely on buff effects can drastically reduce performance, and can also increase the duration of damage over time, such as the bleed or poison from toxic monsters. Take care when choosing this Tribulation
- Tier: 1 – Buffs expire three times faster and Debuffs expire three times slower
 Damaged Defenses
- Tier: 1 – 40% less Defences
- Tier: 2 – 75% less Defences
- Devastating for most builds defensively. Almost always worth avoiding
 Reduced Resistances
- Tier: 1 – -15% to Elemental Resistances and -10% to Maximum Elemental Resistances
- Tier: 2 – -30% to Elemental Resistances and -20% to Maximum Elemental Resistances
- You should avoid this Tribulation. Even with capped elemental resistances, you will take significantly more elemental damage.
 Drought
- Tier: 1 – Monsters grant no Flask and Charm Charges on death
- If you regularly use life or mana flasks to sustain this modifier is very dangerous. If you rely on leech or regeneration, it can almost be considered as free. Note: There is always a well to refill flasks before boss fights if you are confident clearing the other rooms and are only concerned about flasks for bossing.
- Tier: 1 – Monsters grant no Flask and Charm Charges on death
 Escalating Damage Taken
- Tier: 1 – In each encounter room, damage taken will slowly increase by 1% per second, up to 50%
- Several of the rooms you will need to complete can take significantly more than 50 seconds to complete, and as such, this Tribulation can force you to take a lot more damage. Worth avoiding
- Tier: 1 – In each encounter room, damage taken will slowly increase by 1% per second, up to 50%
 Monster Speed
- Tier: 1 – Monsters gain 20% increased Skill Speed
- Monster action speed is a very dangerous modifier, especially for boss rooms. Carefully consider your other options before choosing this Tribulation
- Tier: 1 – Monsters gain 20% increased Skill Speed
 Chaotic Monsters
- Tier: 1 – Monsters gain 20% of damage added as extra Chaos damage
- Tier: 2 – Monsters gain 50% of damage added as extra Chaos damage
- If you have Chaos Inoculation, then this Tribulation is free at both Tiers. If you have high or capped chaos resistance then Tier 1 is fairly manageable, but Tier 2 is still very dangerous
 Deadly Monsters
- Tier: 1 – Monsters have 300% increased Critical Hit Chance
- Tier: 2 – Monsters always deal Critical Hits
- On all but the most defensively strong characters with some form of critical damage reduction, you should avoid this Tribulation
 Toxic Monsters
- Tier: 1 – Monster Hits always inflict Bleeding and Poison
- Chaos Inoculation makes this Tribulation a free choice. For all other characters, consider your ability to withstand strong damage over time effects, either through leech or regen or charms, before choosing it
- Tier: 1 – Monster Hits always inflict Bleeding and Poison
 Resistant Monsters
- Tier: 1 – Monsters have +40% to all Resistances
- Physical damage-dealing characters can choose this Tribulation freely. If your primary damage type is elemental or chaos you will want to make sure you have some form of penetration to offset the significant damage loss it causes
- Tier: 1 – Monsters have +40% to all Resistances
 Unstoppable Monsters
- Tier: 1 – Monsters cannot be Slowed or Stunned
- For builds that aren’t reliant on stunning or slowing enemies, this is a free Tribulation. If your build utilizes those mechanics heavily, you should avoid it
- Tier: 1 – Monsters cannot be Slowed or Stunned
 Shielding Monsters
- Tier: 1 – Monsters are protected by Energy Shield
- Can make builds that rely on bleed suffer. Otherwise is just a general monster durability bonus
- Tier: 1 – Monsters are protected by Energy Shield
 Entangling Monsters
- Tier: 1 – Monsters inflict Grasping Vines on Hit
- Much more dangerous to characters without high evasion, or characters that fight in melee range and get hit often. As it lowers your movement speed dramatically it should generally be avoided by all but the most experienced players
- Tier: 1 – Monsters inflict Grasping Vines on Hit
 Enraged Bosses
- Tier: 1 – Bosses deal more damage and take less damage
- Unless you are extremely tanky or have incredible damage output, avoid this Tribulation. Bosses in the Trial of Chaos are the most dangerous encounters and buffing them significantly is almost never worth it
- Tier: 1 – Bosses deal more damage and take less damage
 Lethal Rare Monsters
- Tier: 1 – Rare Monsters have 1 additional Modifier | 30% increased number of Rare Monsters
- This modifier significantly buffs all Rare monsters you encounter, but if you can handle the added difficulty, it also buffs their loot drops. A must pick if you are confident in your build
- Tier: 1 – Rare Monsters have 1 additional Modifier | 30% increased number of Rare Monsters
 Random Projectiles
- Tier: 1 – Your Projectiles fly in random directions | Monsters fire additional Projectiles
- Even if you don’t use projectile skills, the additional projectiles granted to monsters can be deceptively dangerous. Be sure of your characters durability before choosing this
- Tier: 1 – Your Projectiles fly in random directions | Monsters fire additional Projectiles
 Occasional Impotence
- Tier: 1 – You and your Minions deal no damage for 2 seconds every 8 seconds
- This effectively reduces your damage dealt by 25%, which is a significant reduction. You should generally avoid this
- Tier: 1 – You and your Minions deal no damage for 2 seconds every 8 seconds
 Volatile Fiends
- Tier: 1 – Monsters release deadly Volatiles on death. Rare monsters leave larger ones
- While the volatiles are mostly avoidable, they require you to maintain very high concentration, and a single mistake could result in death. Generally worth avoiding
- Tier: 1 – Monsters release deadly Volatiles on death. Rare monsters leave larger ones
 Heart Tethers
- Tier: 1 – Bloody hearts appear that apply tethers, Slowing you. Breaking the tether will Stun you
- Tier: 2 – Bloody hearts appear that apply tethers, Slowing you. Breaking the tether will Stun you and cause you to become vulnerable to damage for a duration
- Tier 1 of this Tribulation is mildly annoying but low threat and is often a good choice. Tier 2 has an added vulnerability effect that can cause you to take much more damage and should be avoided
 Stormcaller Runes
- Tier: 1 – Runes will appear that will call deadly Lightning storms if you remain in them
- Tier: 2 – Large runes will appear that will call deadly Lightning storms if you remain in them
- Tier: 3 – Many large runes will appear that will call deadly Lightning storms if you remain in them
- With capped (75%) or higher lightning resistance, all Tiers of this Tribulation are typically easy to handle
 Impending Doom
- Tier: 1 – Rings of Doom appear on the ground which grow over time, exploding for Physical damage once they reach a maximum area
- Tier: 2 – Rings and circles of Doom appear on the ground which grow over time, exploding for Physical damage once they reach a maximum area
- These circles do very high physical damage and are difficult to mitigate for most characters. Unless you have very high armor or other sources of physical damage mitigation, you should avoid choosing this
 Blood Globules
- Tier: 1 – Globules of blood manifest nearby, tracking you. When above you they will fall, dealing Physical damage
- Tier: 2 – Globules of blood manifest nearby, tracking you. When above you they will fall, dealing Physical damage and creating damaging blood ground
- Well telegraphed and easy to dodge, with only moderate damage output even at Tier 2 if you do get hit. A good choice in most circumstances
 Vaal Omnitech
- Tier: 1 – An ancient Vaal machination will deploy attacks against nearby intruders
- Tier: 2 – An ancient Vaal machination will deploy an array of attacks against nearby intruders
- Tier: 3 – An ancient Vaal machination will deploy a powerful array of attacks against nearby intruders
- Makes boss fights much harder. Avoid it unless absolutely necessary, and never stack it to Tier 3
 Pyramid Beams
- Tier: 1 – Pyramid objects appear, projecting four rotating lasers that inflict Corrupted Blood on Hit
- Tier: 2 – Pyramid objects appear, projecting four fast rotating lasers that inflict Corrupted Blood on Hit
- You can roll through the beams to avoid them, so if you are confident in your dodge rolling, its downside can be mitigated. Just be careful not to let the Corrupted Blood debuff stack up
 Petrification Statues
- Tier: 1 – Challenge area contains several statues that Petrify you if you stand within their gaze for a duration
- Tier: 2 – Challenge area contains several statues that Petrify you for a long duration if you stand within their gaze for a short duration
- Getting petrified causes a complete loss of control for your character. This often results in death. Typically a bad choice
 Blood Mist
- Tier: 1 – Challenge area is enshrouded by a blood mist which makes monsters within it immune to damage
- Anything that makes monsters immortal is very dangerous and frustrating. Avoid at all costs
- Tier: 1 – Challenge area is enshrouded by a blood mist which makes monsters within it immune to damage
 Stalking Shade
- Tier: 1 – An invulnerable shade stalks you, inflicting Ruin with its Melee hits | Fail the Trial on reaching 7 Ruin
- Tier: 2 – An invulnerable shade stalks you, gaining speed and inflicting Ruin with Melee and Projectile hits | Fail the Trials on reaching 7 Ruin
- Tier: 3 – An invulnerable shade stalks you, gaining further speed and inflicting Ruin with powerful Melee and Projectile hits | Fail the Trials on reaching 7 Ruin
- Tier 1 Shades are very slow and attack very slowly. They can be hard to keep track of, but are generally manageable. Tier 2-3 Shades fire projectiles that can be very difficult to spot, and ruin persists for the entire run. Avoid Tier 2 and 3, and only take Tier 1 if you can track the shade well
 Burning Turrets
- Tier: 1 – Challenge area contains turrets that will periodically fire Fire Projectiles ahead
- Tier: 2 – Challenge area contains turrets that will periodically fire barrages of Fire Projectiles ahead
- With capped (75%) fire resistance, the damage these turrets deal is negligible. Mostly considered a free Tribulation
 Shocking Turrets
- Tier: 1 – Challenge area contains turrets that will periodically fire Lightning Projectiles ahead
- Tier: 2 – Challenge area contains turrets that will periodically fire a wave of Lightning Projectiles ahead
- With capped (75%) lightning resistance, the damage these turrets deal is negligible. Mostly considered a free Tribulation
 Temple Traps
- Tier: 1 – Challenge area contains spikes that deal Physical damage to those who step on them
- Tier: 2 – Challenge area contains many spikes that deal Physical damage to those who step on them
- Physical damage can be difficult to mitigate for many characters. Without high armor or other physical mitigation should probably be avoided
Rewards
For every Tribulation you select, you will receive even more rewards! You will be offered a Soul Core before every boss fight (on rooms 4, 7, and 10) and will otherwise be offered a selection of corrupted Rare items and currency such as Vaal Orbs. Before you select the next room’s Tribulation, you will see a preview of the reward you will be adding to the final treasure vault at the end of the trial. Finally, after defeating the third boss in a 10-room Trial, you will receive a Fate, one of the 3 keys required to enter The Trialmaster’s Arena. Each boss drops a specific Fate.
- Bahlak, The Sky Seer –
 Deadly Fate
 - Uxmal, The Beastlord –
 Cowardly Fate
 - Chetza, The Feathered Plague –
 Victorious Fate
At any point during the Trial, when you are offered a Tribulation, you can check what rewards you have selected up until that point. Before selecting the Tribulation, you can choose to instead leave the run with the loot you have already earned up until that point. If you have found particularly valuable items, it may be wise to end a run early and start a new run if you are not confident in your ability to deal with the compounding Tribulations you have accumulated.
 Soul Core of Atmohua
- Martial Weapons: Convert 20% of Requirements to Strength
- Armour: Convert 20% of Requirements to Strength
 Soul Core of Cholotl
- Martial Weapons: Convert 20% of Requirements to Dexterity
- Armour: Convert 20% of Requirements to Dexterity
 Soul Core of Zantipi
- Martial Weapons: Convert 20% of Requirements to Intelligence
- Armour: Convert 20% of Requirements to Intelligence
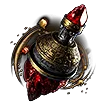 Soul Core of Azcapa
- Martial Weapons:+15 to Spirit
- Armour: 5% increased Quantity of Gold dropped by slain Enemies
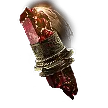 Soul Core of Citaqualotl
- Martial Weapons: 30% increased Elemental Damage with Attacks
- Armour: +5% to all Elemental Resistances
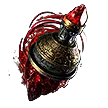 Soul Core of Jiquani
- Martial Weapons: Recover 2% of Life on Kill
- Armour: 2% increased maximum Life
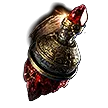 Soul Core of Opiloti
- Martial Weapons: 15% chance to cause Bleeding on Hit
- Armour: 10% increased Charm Charges gained
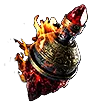 Soul Core of Puhuarte
- Martial Weapons: 30% increased chance to Ignite
- Armour: +1% to Maximum Fire Resistance
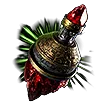 Soul Core of Quipolatl
- Martial Weapons: 5% increased Attack Speed
- Armour: 10% reduced Slowing Potency of Debuffs on You
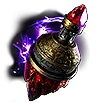 Soul Core of Tacati
- Martial Weapons: 15% chance to Poison on Hit
- Armour: +7% to Chaos Resistance
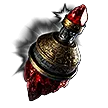 Soul Core of Ticaba
- Martial Weapons: +12% to Critical Damage Bonus
- Armour: Hits against you have 10% reduced Critical Damage Bonus
 Soul Core of Topotante
- Martial Weapons: Attacks with this Weapon Penetrate 15% Elemental Resistances
- Armour: 15% increased Elemental Ailment Threshold
 Soul Core of Tzamoto
- Martial Weapons: 20% increased Freeze Buildup
- Armour: +1% to Maximum Cold Resistance
 Soul Core of Xopec
- Martial Weapons: 30% increased chance to Shock
- Armour: +1% to Maximum Lightning Resistance
 Soul Core of Zalatl
- Martial Weapons: Recover 2% of Mana on Kill
- Armour: 2% increased maximum Mana
Bosses
Throughout the Trial of Chaos, you will encounter three different Bosses. These Bosses can always be found in rooms 4, 7, and 10. The order you encounter the Bosses in will be randomly generated for each new Trial, and while the order you fight them in is mostly unimportant, it is worth remembering that the final Boss in a 10-room Trial of Chaos will always drop its respective Fate. Before each Boss encounter, when you select your Tribulation, you will be offered a Soul Core as a potential reward for completing the upcoming Boss. Below you will find a breakdown of the three different Bosses and their most significant abilities:
Bahlak, The Sky Seer
Bahlak uses a combination of physical and lightning based attacks and a slow, low-threat auto-attack. His Lightning Cascade and Sparknado Form can be devastating if you get caught in them, and so he should be fought with caution, especially in melee range. Here is a breakdown of their abilities:
- Dive Bomb
- Flies straight up before quickly slamming down on top of the character. Be ready to dodge roll quickly to avoid the slam.
- Unblockable – Deals significant stun damage.
- Flies straight up before quickly slamming down on top of the character. Be ready to dodge roll quickly to avoid the slam.
- Dash Attack
- Dashes through you doing minor damage before returning to the arena and unleashing a barrage of fast moving wave attacks across the arena.
- Boss has reduced turning speed while firing waves, so get close and circle around behind them.
- Dashes through you doing minor damage before returning to the arena and unleashing a barrage of fast moving wave attacks across the arena.
- Lightning Cascade
- Charges up briefly before unleashing a barrage of lighting bolts in a line in the direction they are facing.
- Circle or Dodge roll around the boss to avoid during the charge-up animation.
- Charges up briefly before unleashing a barrage of lighting bolts in a line in the direction they are facing.
- Splitting Ball Lightning
- Fires a slow moving ball lightning projectile that forks every 3.5m with a high shock chance.
- Avoid the initial projectile and either move to the other side of the arena or get close to the boss to avoid the forking projectiles.
- Fires a slow moving ball lightning projectile that forks every 3.5m with a high shock chance.
- Sparknado Form
- After a brief animation turns into a large Tornado that pursues the player. It does very high, rapid damage so avoid standing in it at all costs
- This can be hard to dodge as a melee character, so be very careful about standing too close to the boss when he’s not basic attacking.
- After a brief animation turns into a large Tornado that pursues the player. It does very high, rapid damage so avoid standing in it at all costs
- Night Time Enrage Mechanics
- After reaching low life, the boss will darken the arena and start summoning lines of bats that swarm across the arena from changing directions.
- You will see a wind tunnel briefly before the bats attack and start doing damage, so try and get out of them before the bats start swarming. The nighttime effect has a duration, so you can wait it out and focus on dodging if you feel overwhelmed.
- After reaching low life, the boss will darken the arena and start summoning lines of bats that swarm across the arena from changing directions.
Uxmal, The Beastlord
Uxmal functions almost identically to Xyclucian, the Chimera you fought in the Chimeral Wetlands to get your quest item Inscribed Ultimatum. As a refresher, here is a run down of their more dangerous abilities:
- Ground Slam
- Rears up on hind legs and roars before slamming down and dealing high damage in an AoE in front of him.
- Very telegraphed and easy to dodge, simply move out of the way.
- Rears up on hind legs and roars before slamming down and dealing high damage in an AoE in front of him.
- Dragons Breath
- Takes to the air and breathes fire onto the ground while following the player while leaving a burning ground effect.
- Only used on the upper level of the arena. When he flies into the air, simply walk away until he finishes flying.
- Takes to the air and breathes fire onto the ground while following the player while leaving a burning ground effect.
- Lightning Breath
- Briefly charges up lightning in their mouth before unleashing a wave of lightning orbs that have a high shock chance and explode for high damage after a duration.
- Only used on the lowest level of the arena. Simply dodge roll or sidestep the initial projectile barrage to avoid most of the damage.
- Briefly charges up lightning in their mouth before unleashing a wave of lightning orbs that have a high shock chance and explode for high damage after a duration.
- Frost Breath
- Rears up on hind legs and begins channeling a ray of frost on the ground in front of them, creating an expanding patch of frozen ground that reduces your action speed and deals damage over time.
- Chaos Spray
- Raises their tail and unleashes a rapid and devastating barrage of chaos damage projectiles that also leave poisoned ground in an AoE where they land.
- Easily the most difficult attack to avoid. If you don’t have high Chaos Resistance or Chaos Inoculation for chaos damage immunity, you will want to create some distance and keep moving until the barrage ends.
- Raises their tail and unleashes a rapid and devastating barrage of chaos damage projectiles that also leave poisoned ground in an AoE where they land.
Chetza, The Feathered Plague
Chetza uses a combination of basic pecking attacks, blood and bone spells and regurgitated Plaguelings to pressure you. Below you can find a breakdown of its signature abilities:,
- Blood Vomit
- Fires three projectiles, first to one side, then the other, then the center. Deals a moderate amount of physical damage.
- The attacks come out fast but are narrow and follow a specific pattern. Stand in the dead zones between the attacks.
- Fires three projectiles, first to one side, then the other, then the center. Deals a moderate amount of physical damage.
- Blood Mortar
- Fires a barrage of blood globules into the air that splatter down covering a large area.
- Individually do low damage, but can shotgun. Try to avoid being hit by multiple impacts.
- Fires a barrage of blood globules into the air that splatter down covering a large area.
- Blood Slam
- Builds up a large ball of blood in its mouth before slamming its head into the ground in front of it.
- It can be dodged or blocked, or simply moved out of if you notice the animation quickly enough.
- Builds up a large ball of blood in its mouth before slamming its head into the ground in front of it.
- Bone Spirals
- Slams its head into the ground, creating spirals of spikes to radiate out from around its head. After a short delay, these spikes explode out of the ground, inflicting guaranteed bleed and maim.
- This attack can be avoided by quickly moving into the space between the spirals to avoid the bulk of the damage, the bleed, and the maim.
- Slams its head into the ground, creating spirals of spikes to radiate out from around its head. After a short delay, these spikes explode out of the ground, inflicting guaranteed bleed and maim.
- Summon Plagueling
- Coughs up a small dog-like minion who will pursue and attack you consistently. If not killed, after a duration, it will be re-swallowed by Chetza and can then be summoned again later in the fight.
- Depending on your build, you could choose to either nuke down or ignore this minion.
- Coughs up a small dog-like minion who will pursue and attack you consistently. If not killed, after a duration, it will be re-swallowed by Chetza and can then be summoned again later in the fight.
Changelog
25/03/2025 – Guide originally written
04/04/2025 – Updates to Soul Cores and Tribulations based on .2.0 patch notes
 Druid
Druid Huntress
 Mercenary
 Monk
Monk Ranger
 Sorceress
 Warrior
 Witch
Witch
